


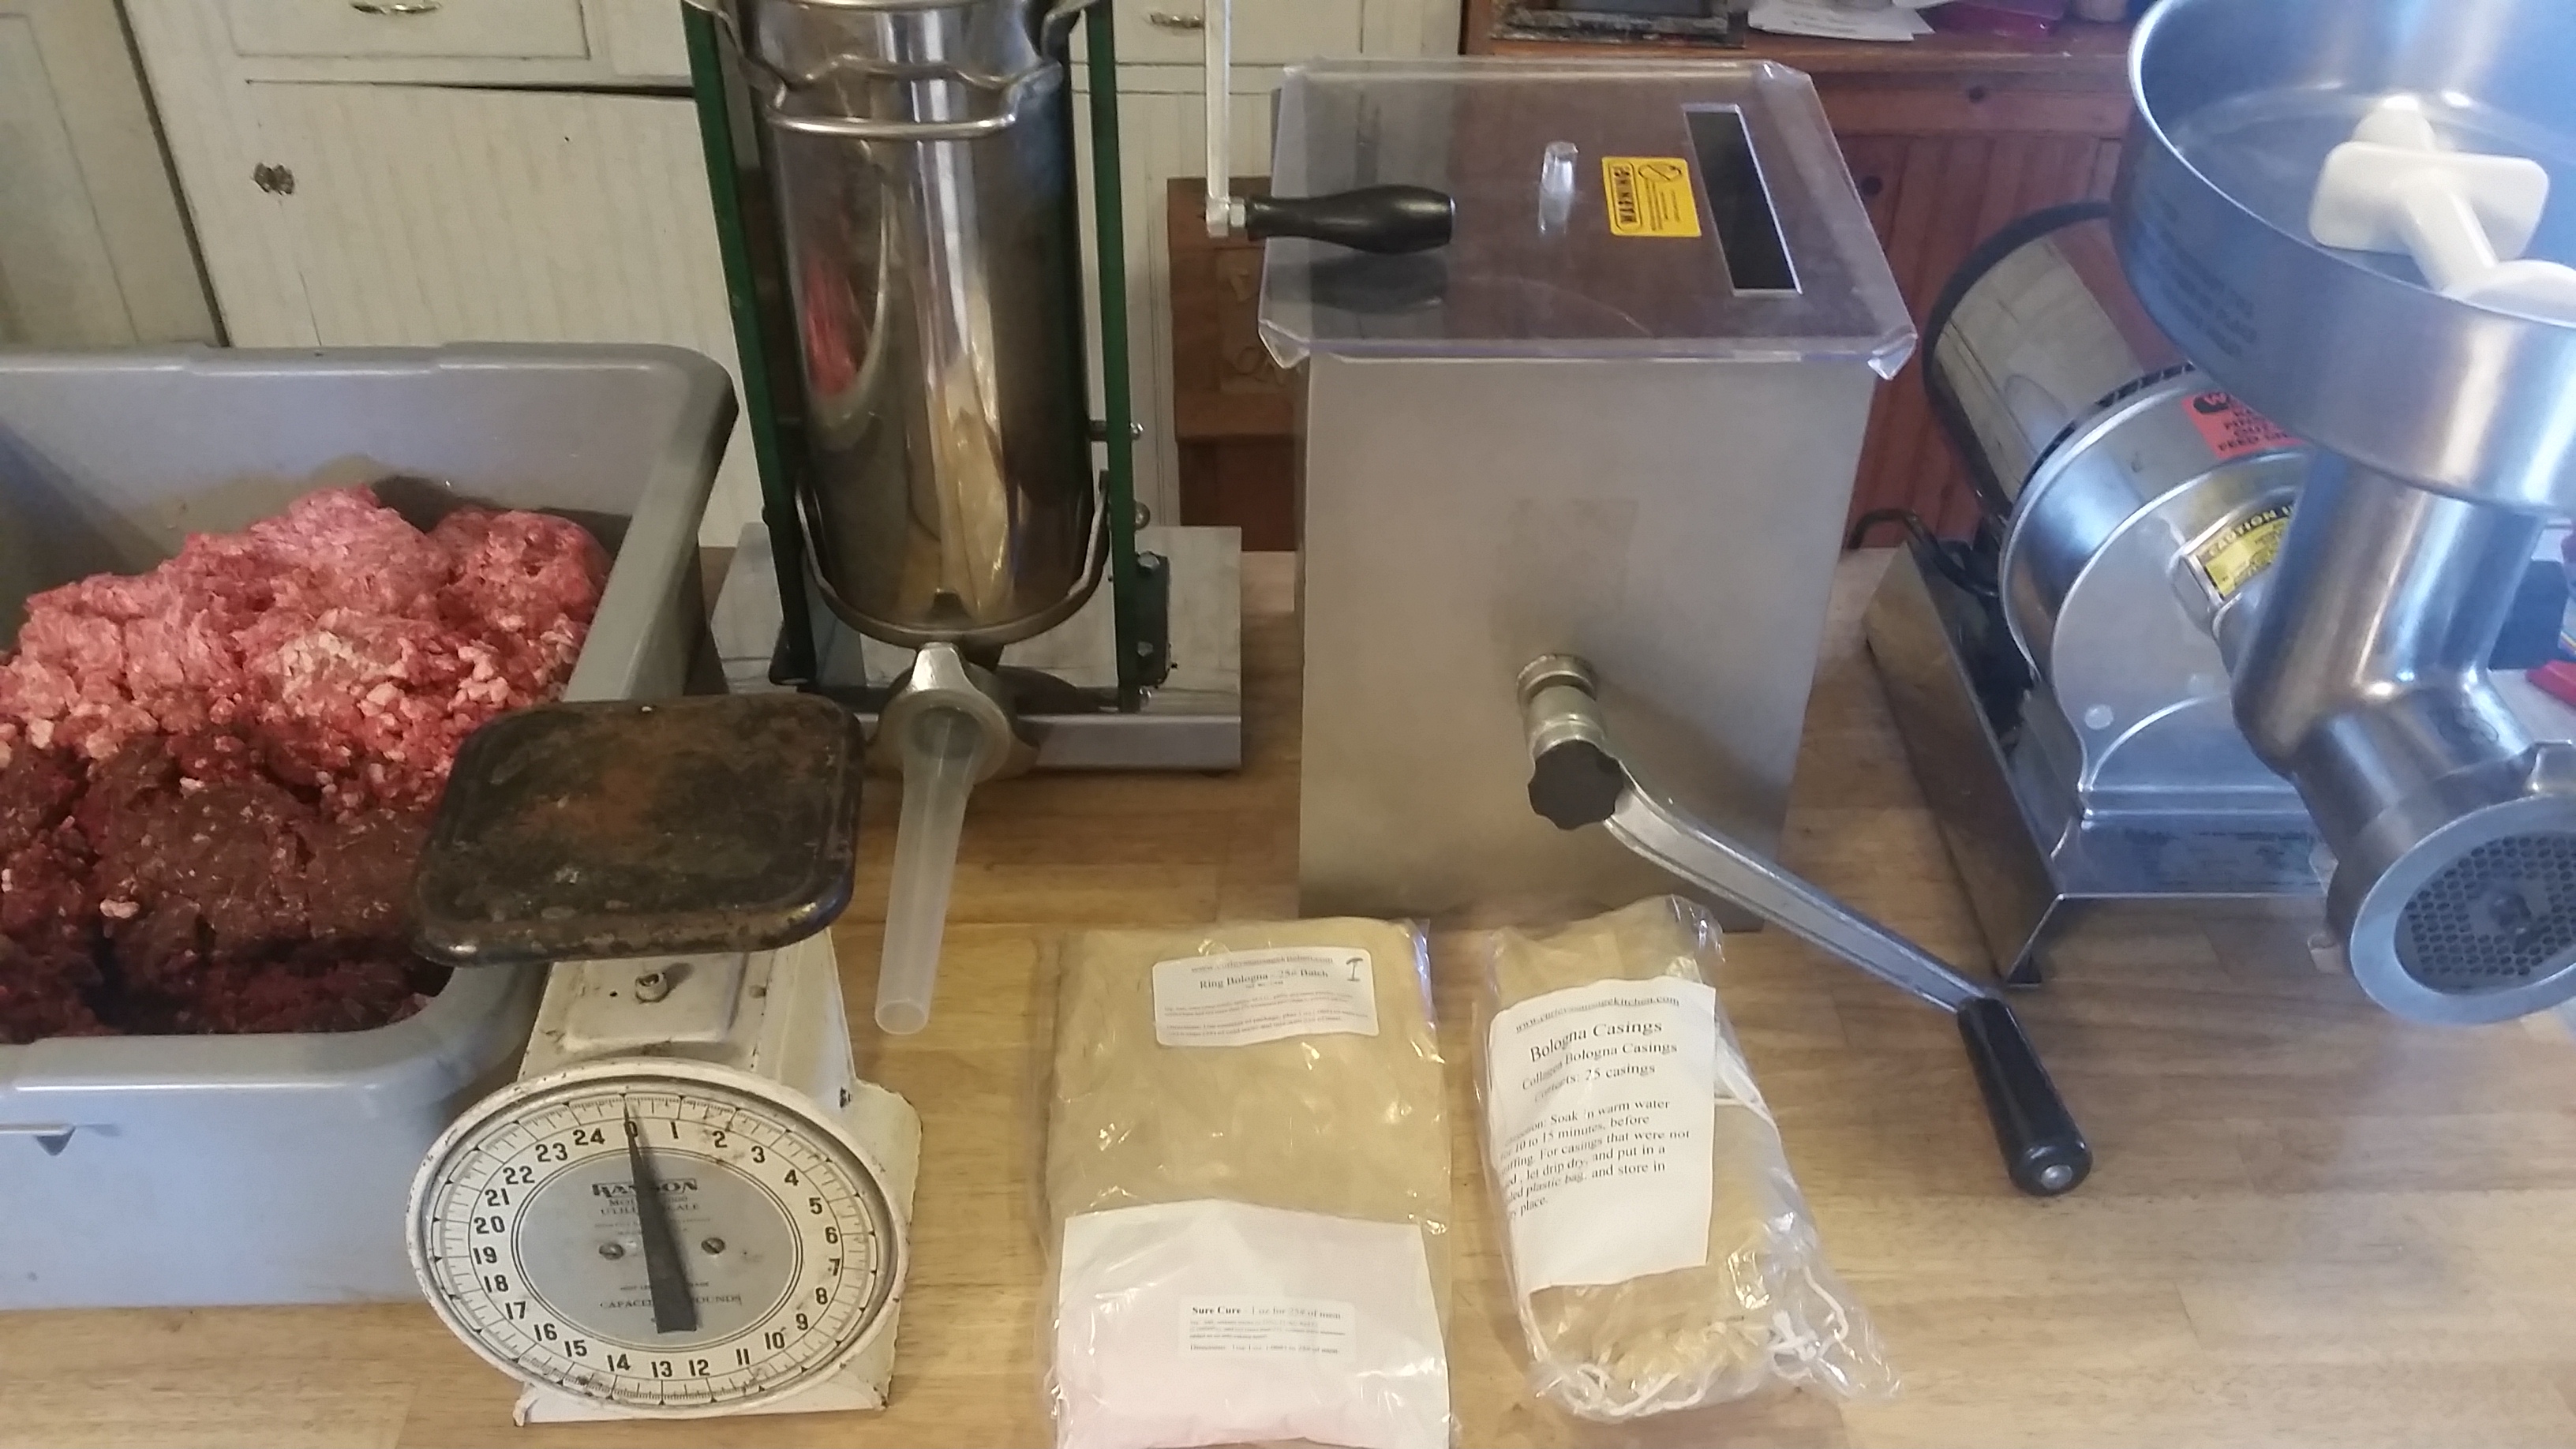
 After my last post about canning deer meat, I received some questions about other processing I do, so I thought I’d write a follow up about making sausage. I’ll try to keep this fairly generic, as the basic principles can be applied to many different types of sausage, but this will specifically be about making ring bologna, since that was the next product on my list. To start things off, I like to get everything out and make sure I have everything I’ll need to complete the process without having to stop in the middle and run to town for something simple.
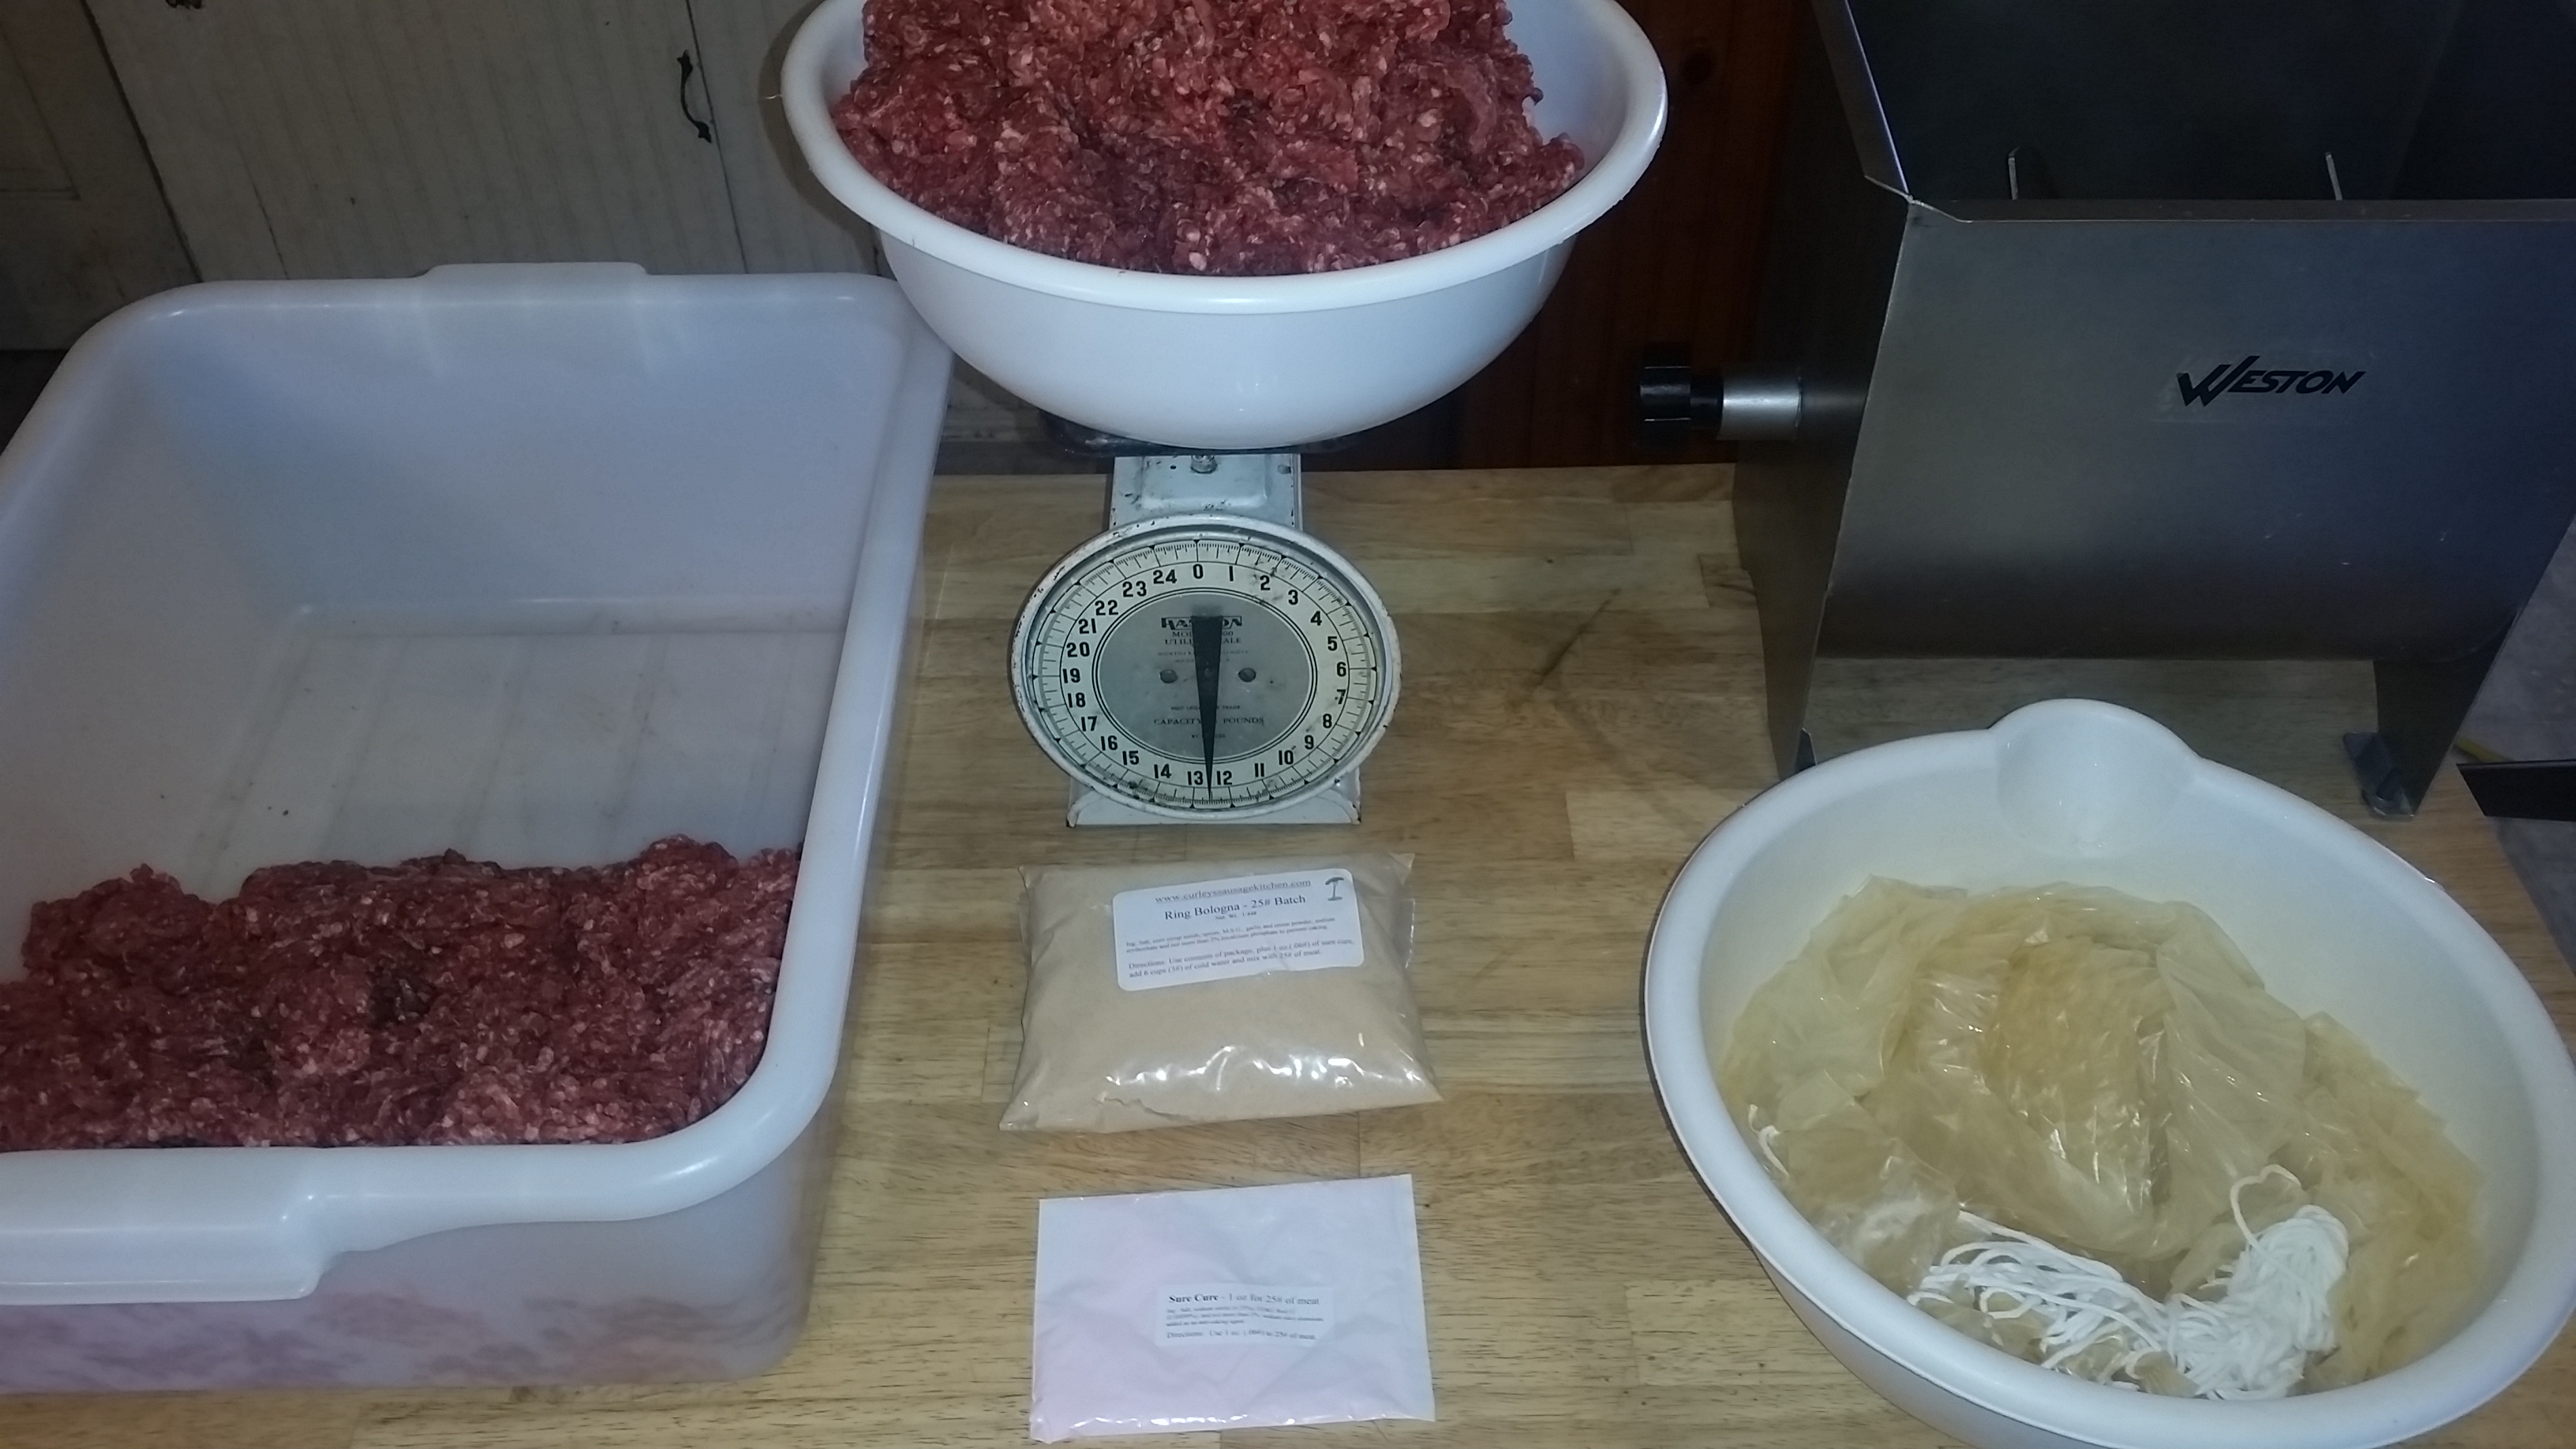
 As I debone each deer, I take whatever cuts I’m not going to can or otherwise use whole muscle and run it once through the grinder with a coarse plate just to make it uniform and easier to deal with later. I then bag and freeze it, making sure to label it with weight and short description, such as “once ground shotgun deer,” which is what this particular batch was made from. This batch of 25lbs was a mixture of 13.5lbs deer and 11.5 ground pork. The seasoning kit I used was from Curley’s Sausage Kitchen in Fairbank, IA. I have heard a lot about their products, but this is the first time I’ve tried them. I like the fact that I’m supporting a local business by using their products, and so far I am very happy with their quality and service.
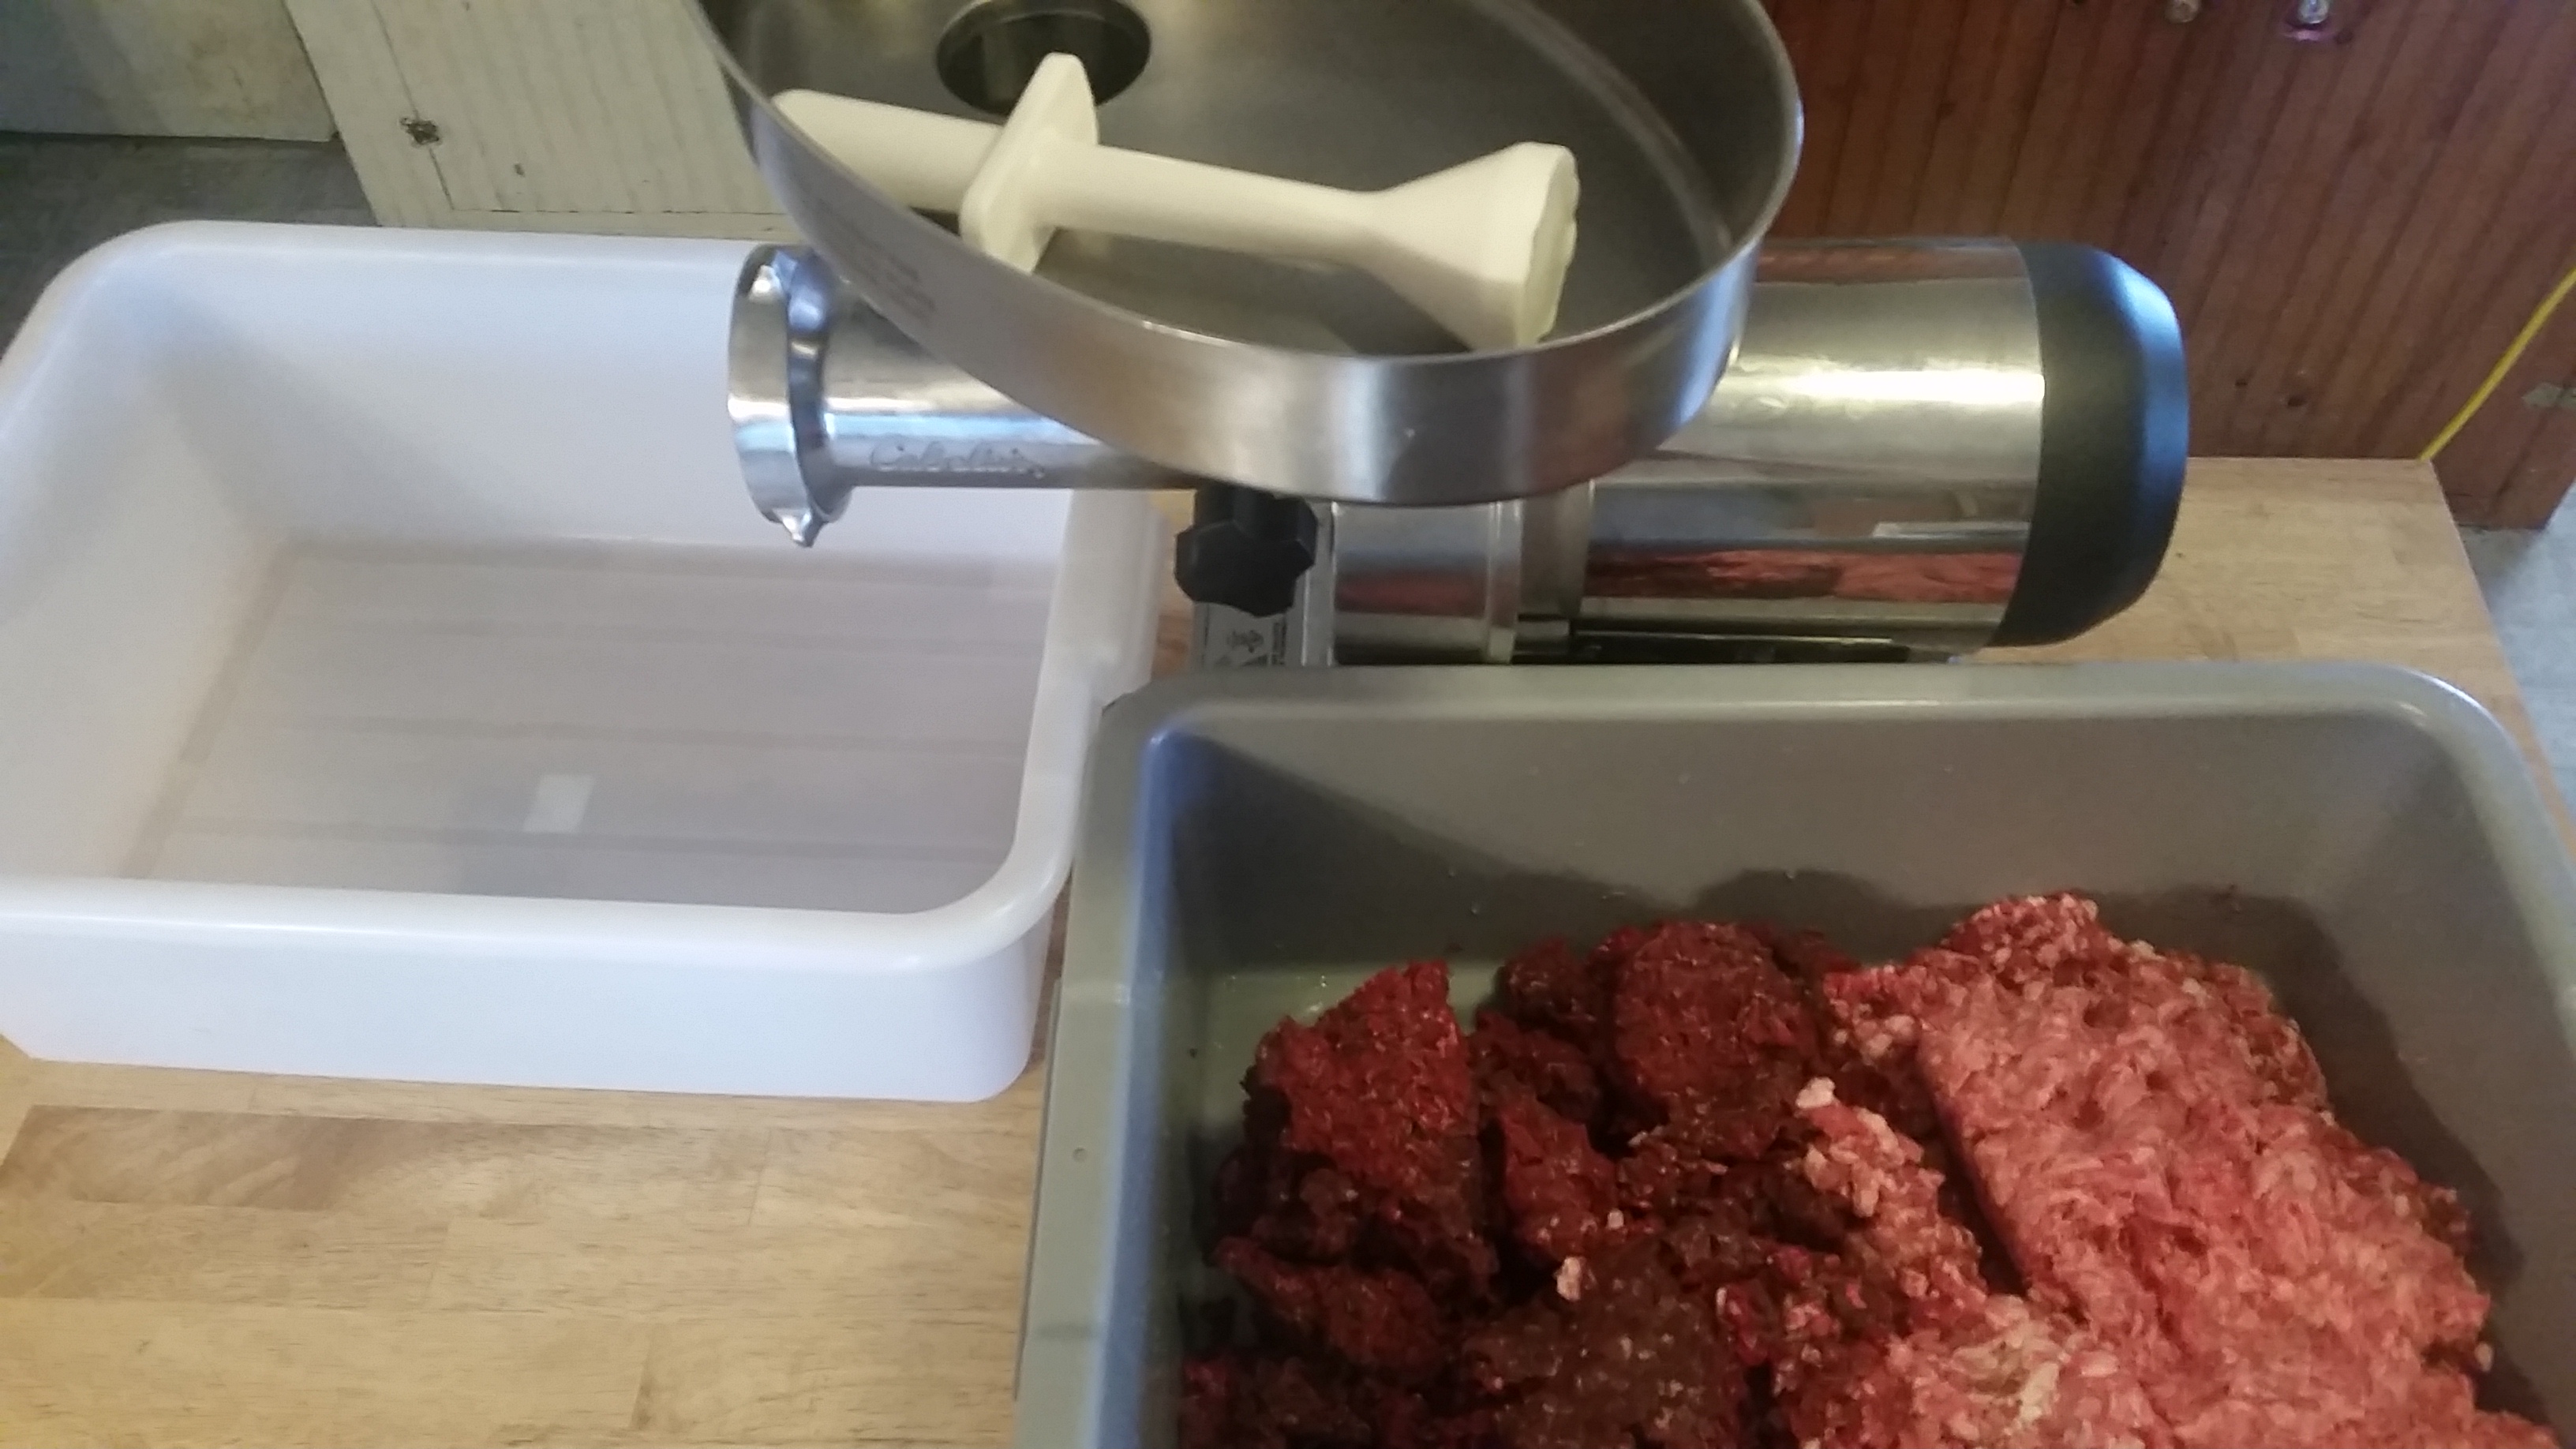
 The first step is grinding the meat a second time through a fine plate. Some of the kits I have used in the past have recommended only grinding once, or twice but through a coarse plate both times. I have found that I like having everything run through a fine plate, so that’s what I do. It seems like everything mixes together better and I prefer it that way. Even the ground pork I buy from the store needs to be run through a fine plate in my opinion, and it works well to run it through at the same time as the deer to start mixing everything together.
 Once the meat is ground, I prepare the casings. This kit uses collagen casings, which just need to be soaked in warm water before they can be stuffed. If I was using natural casings, they would need to have all the salt rinsed off of them and then soaked in warm water. While the casings soak, I measure out the meat to make sure my seasonings will be right. My meat mixer only holds 15lbs at a time, so I need to split this batch in half to make things work better.
 The first half of meat goes in the mixer with the correct amount of seasoning, cure, and ice water. Anything that will be smoked will use curing salt to ensure the meat stays safe while it’s being cooked. If you are making fresh sausage you will not use the cure. The cure is mainly sodium nitrite, which prevents the growth of bacteria that can cause the meat to spoil and even give you botulism. I mix the meat for several minutes making sure all the seasoning gets dispersed throughout the meat. The curing salt will cause the meat to turn brown and become very tacky. I take the first half from the mixer and mix the second half the same way.
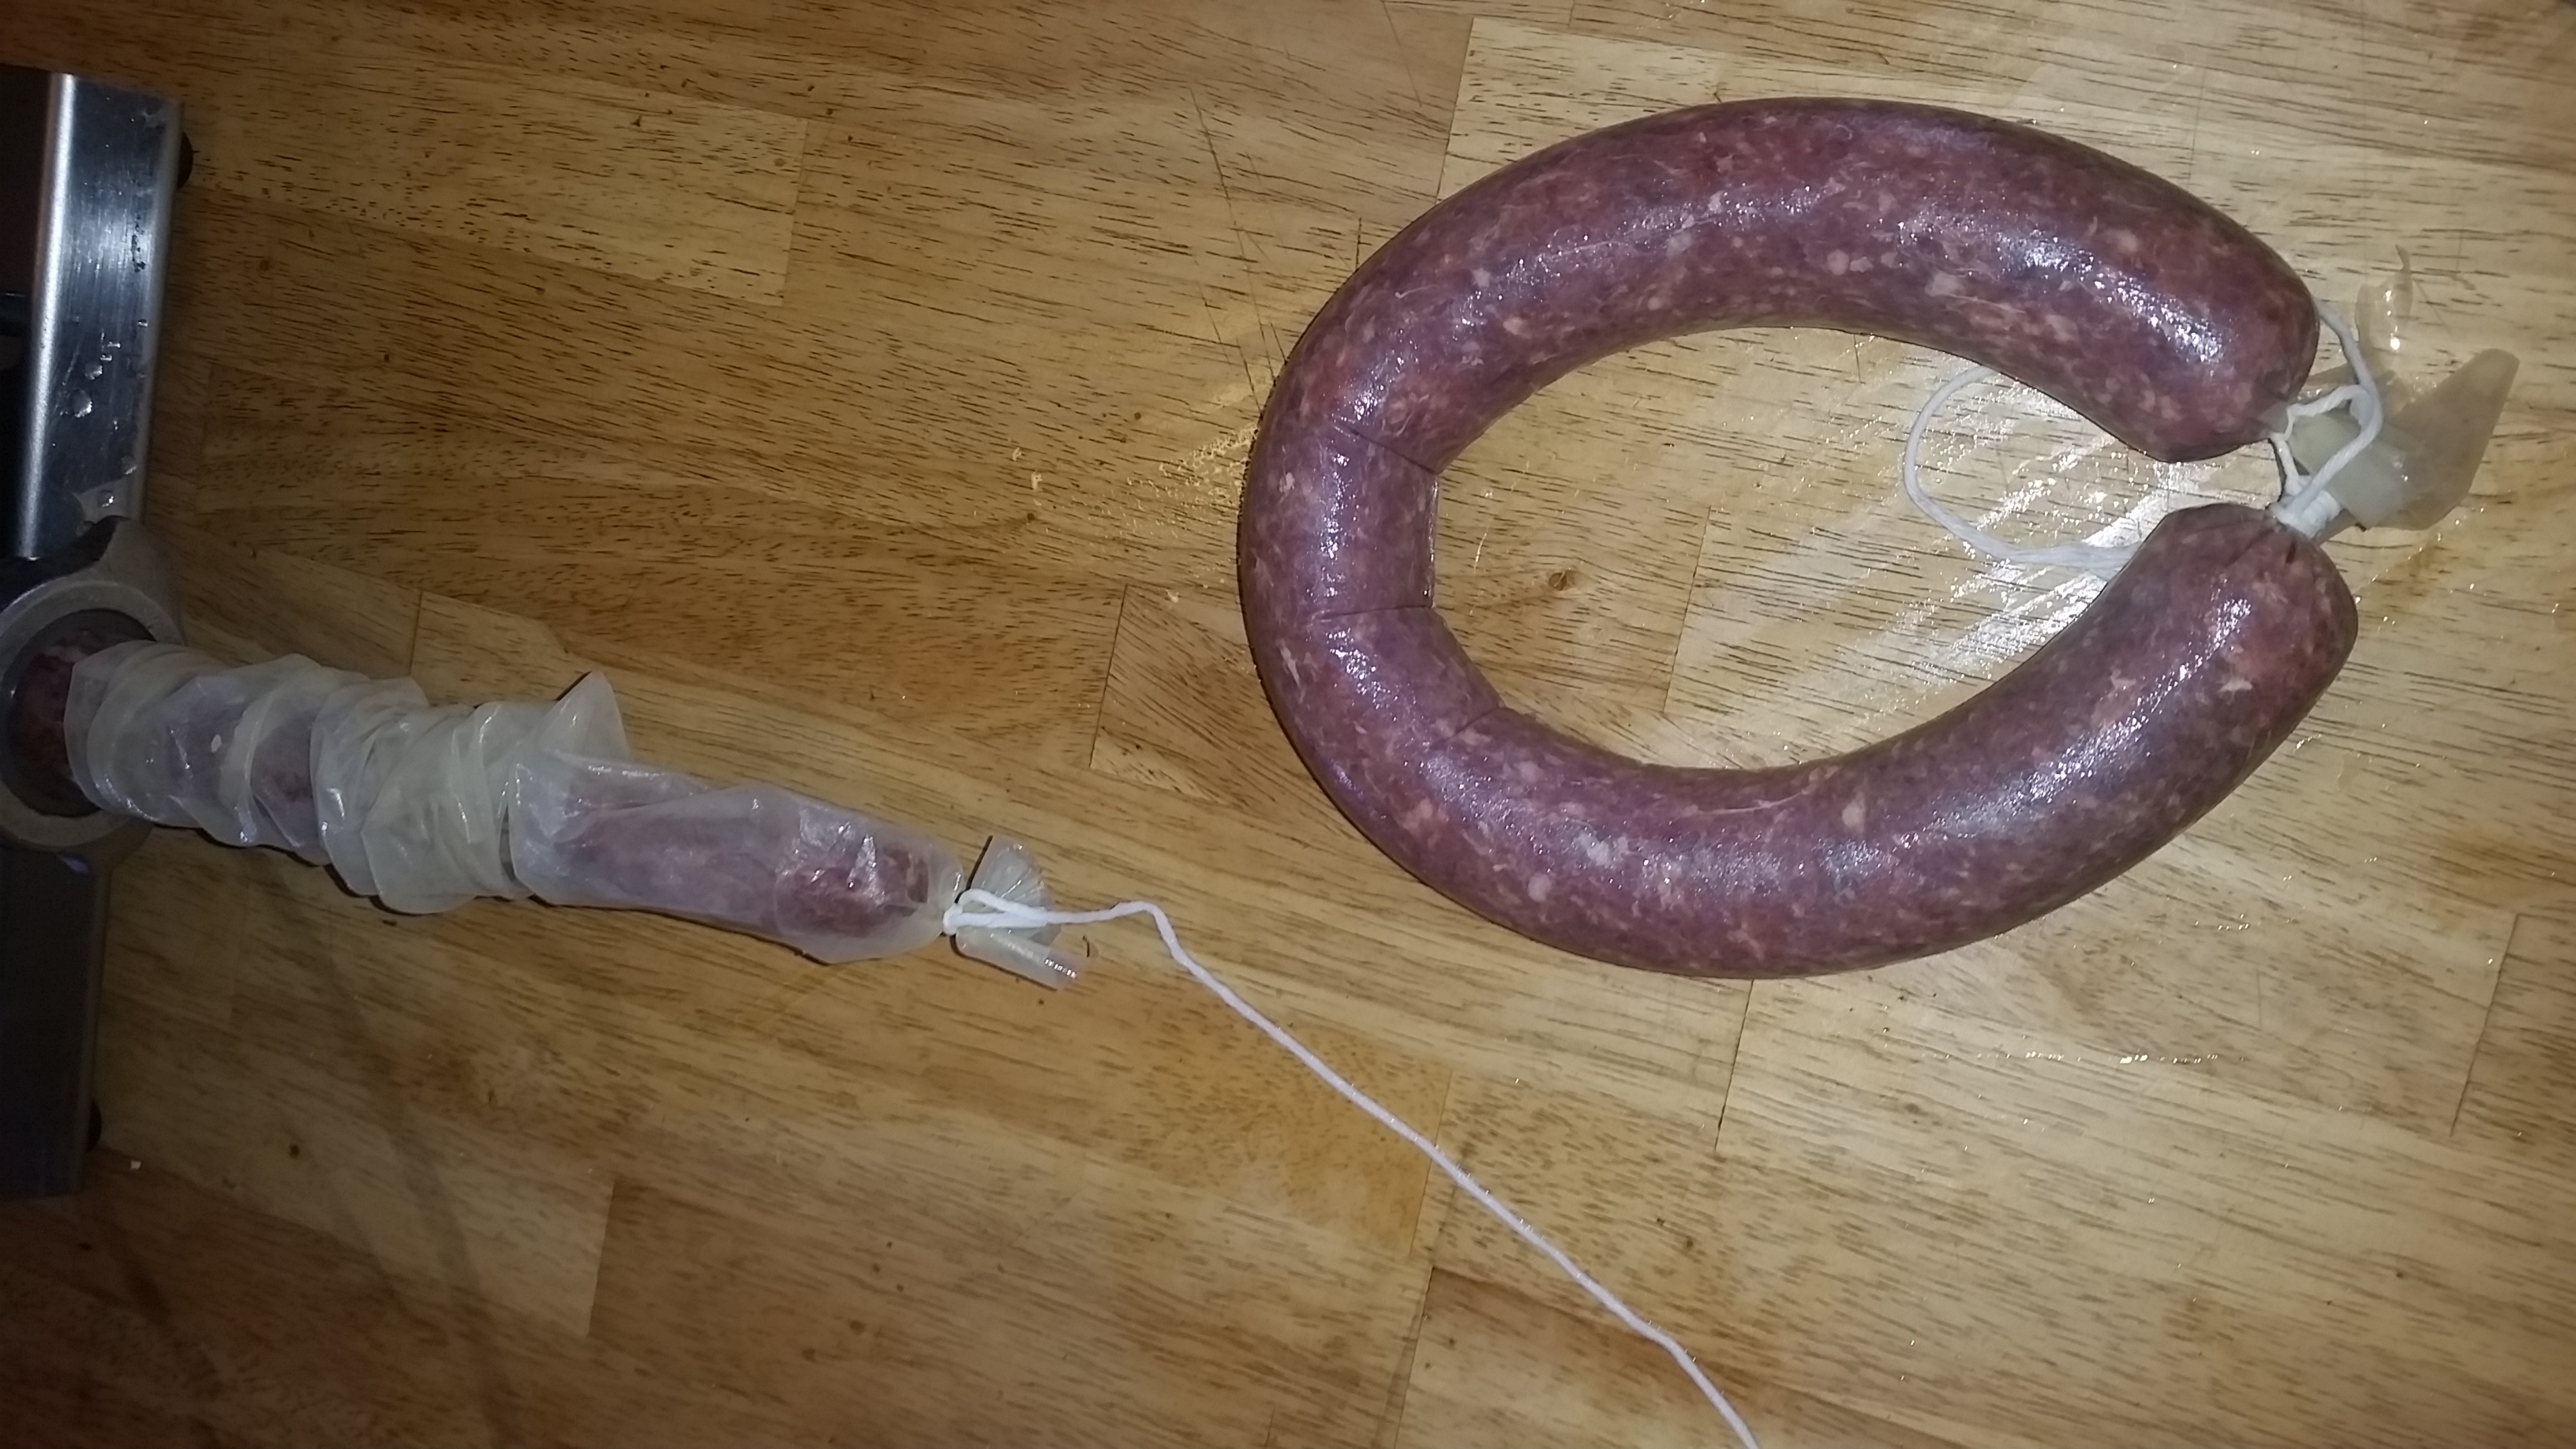
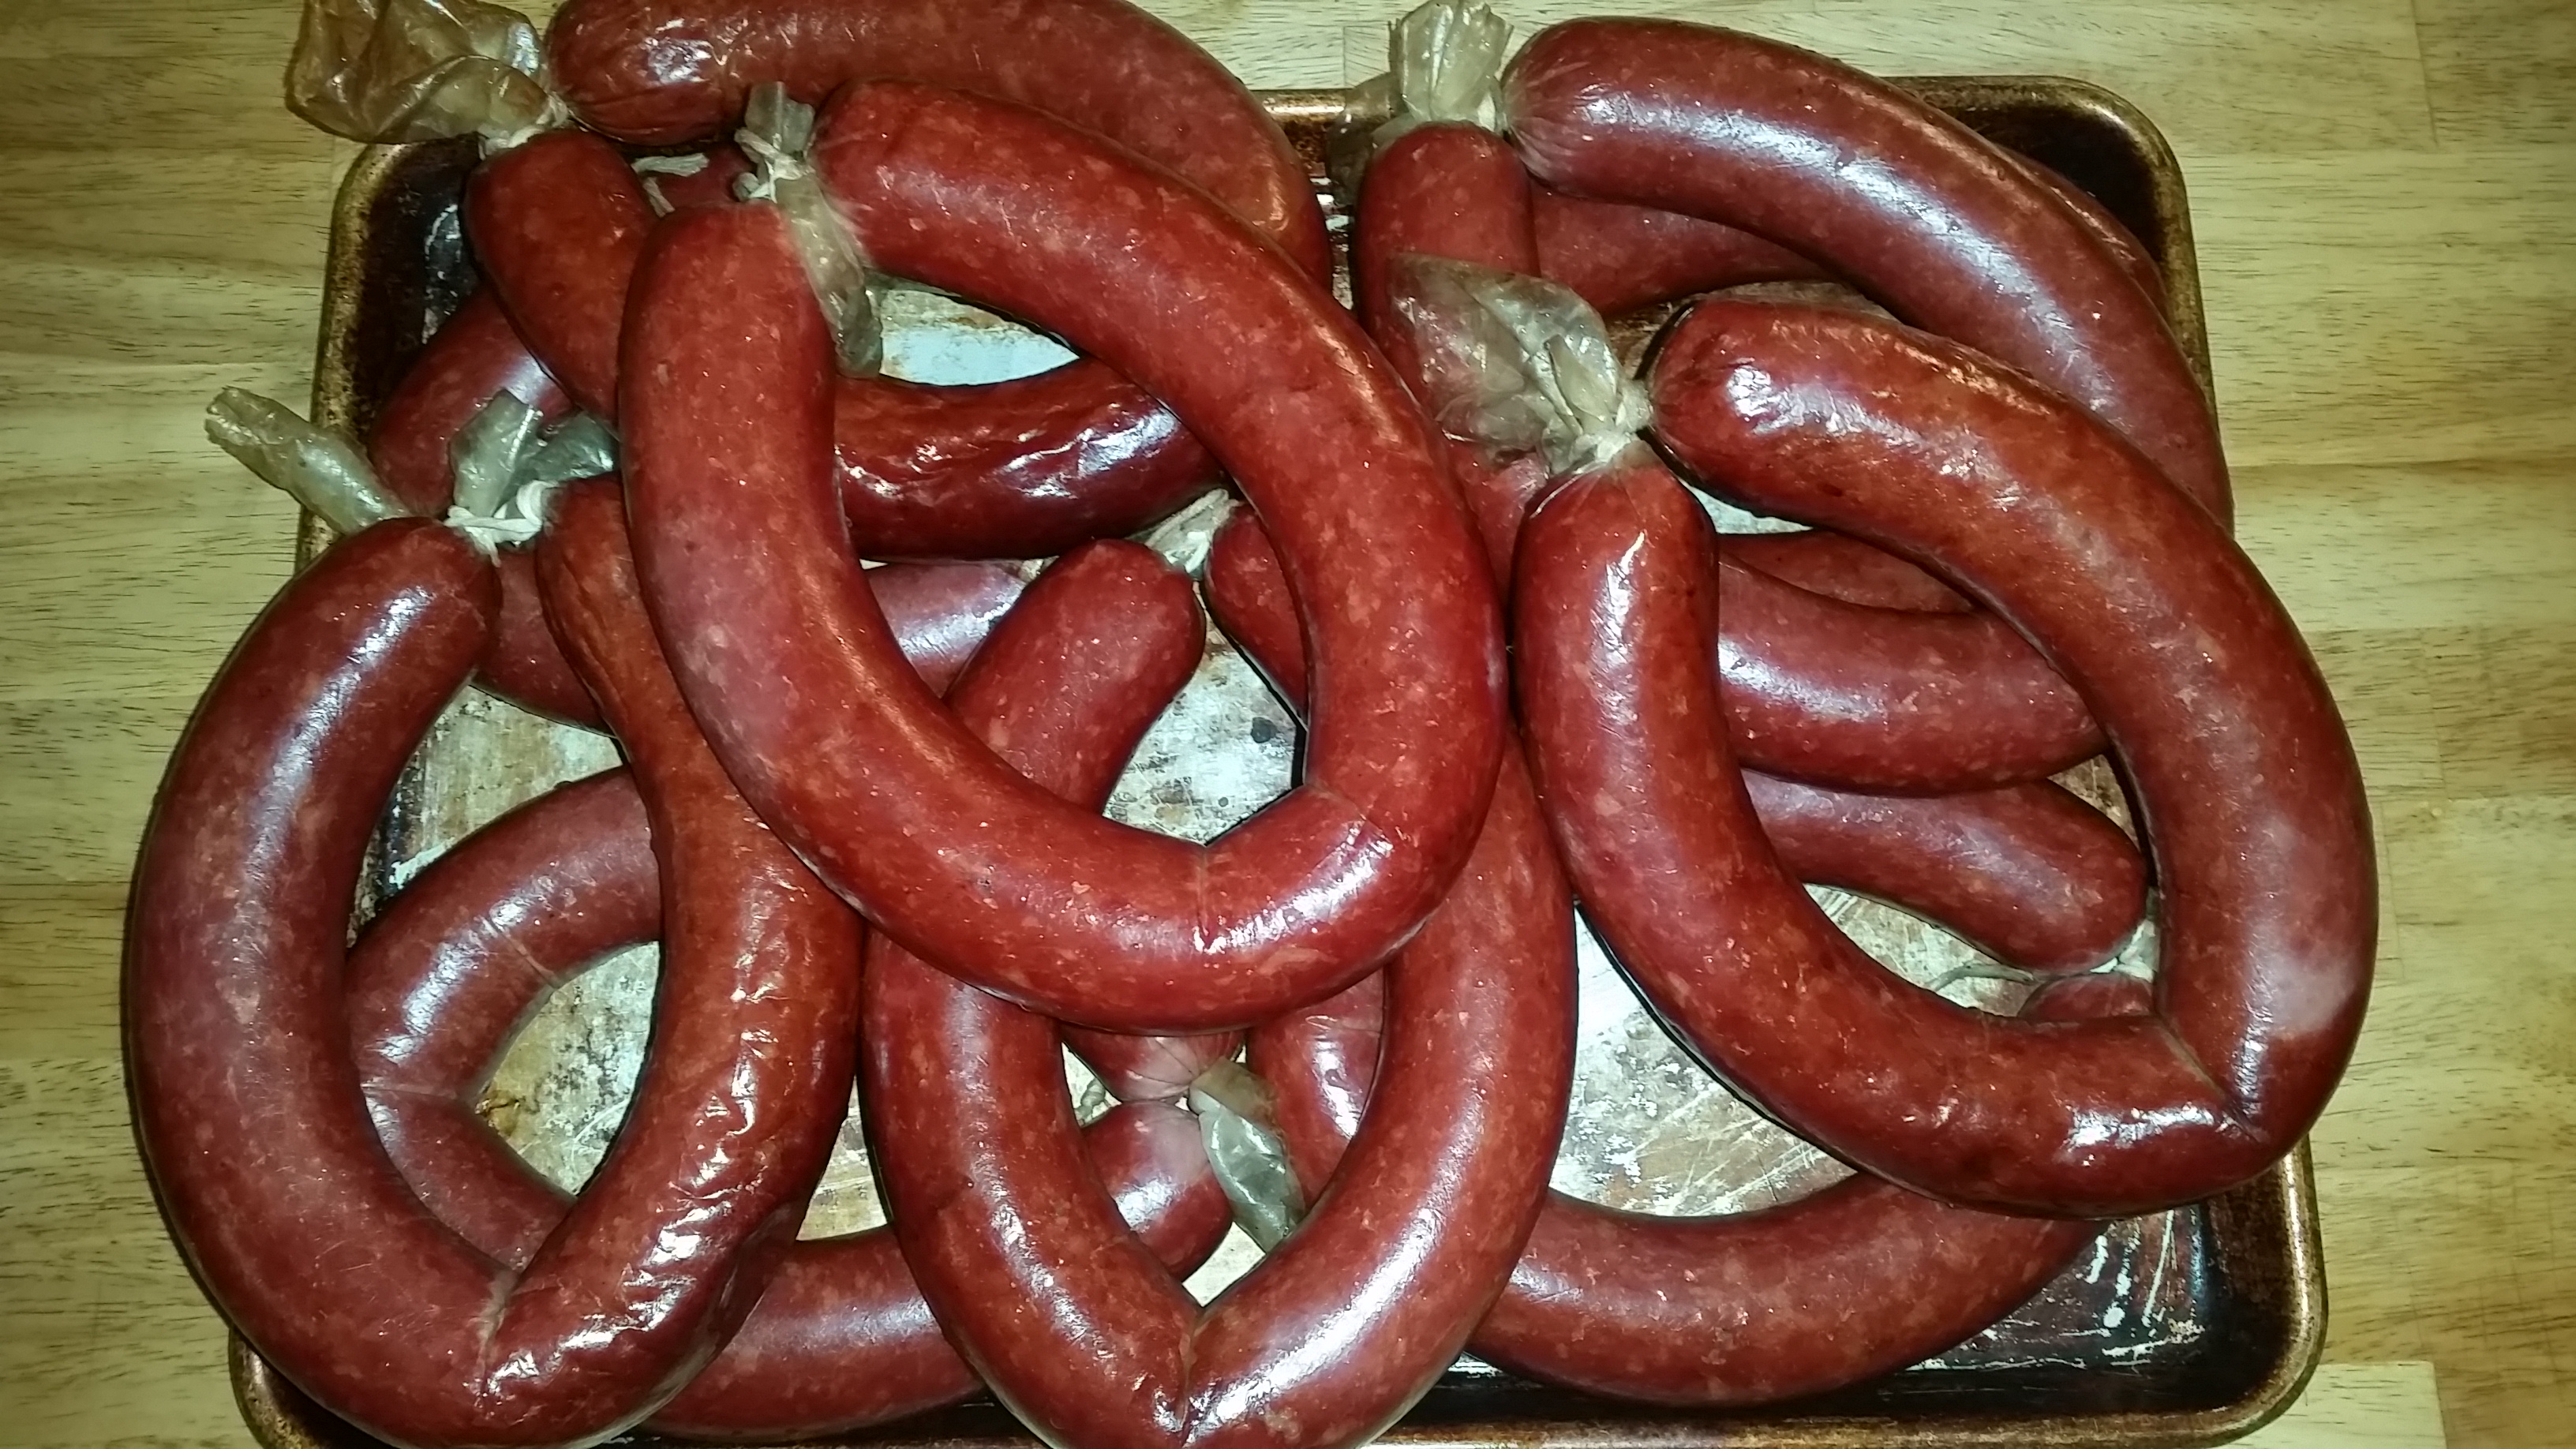
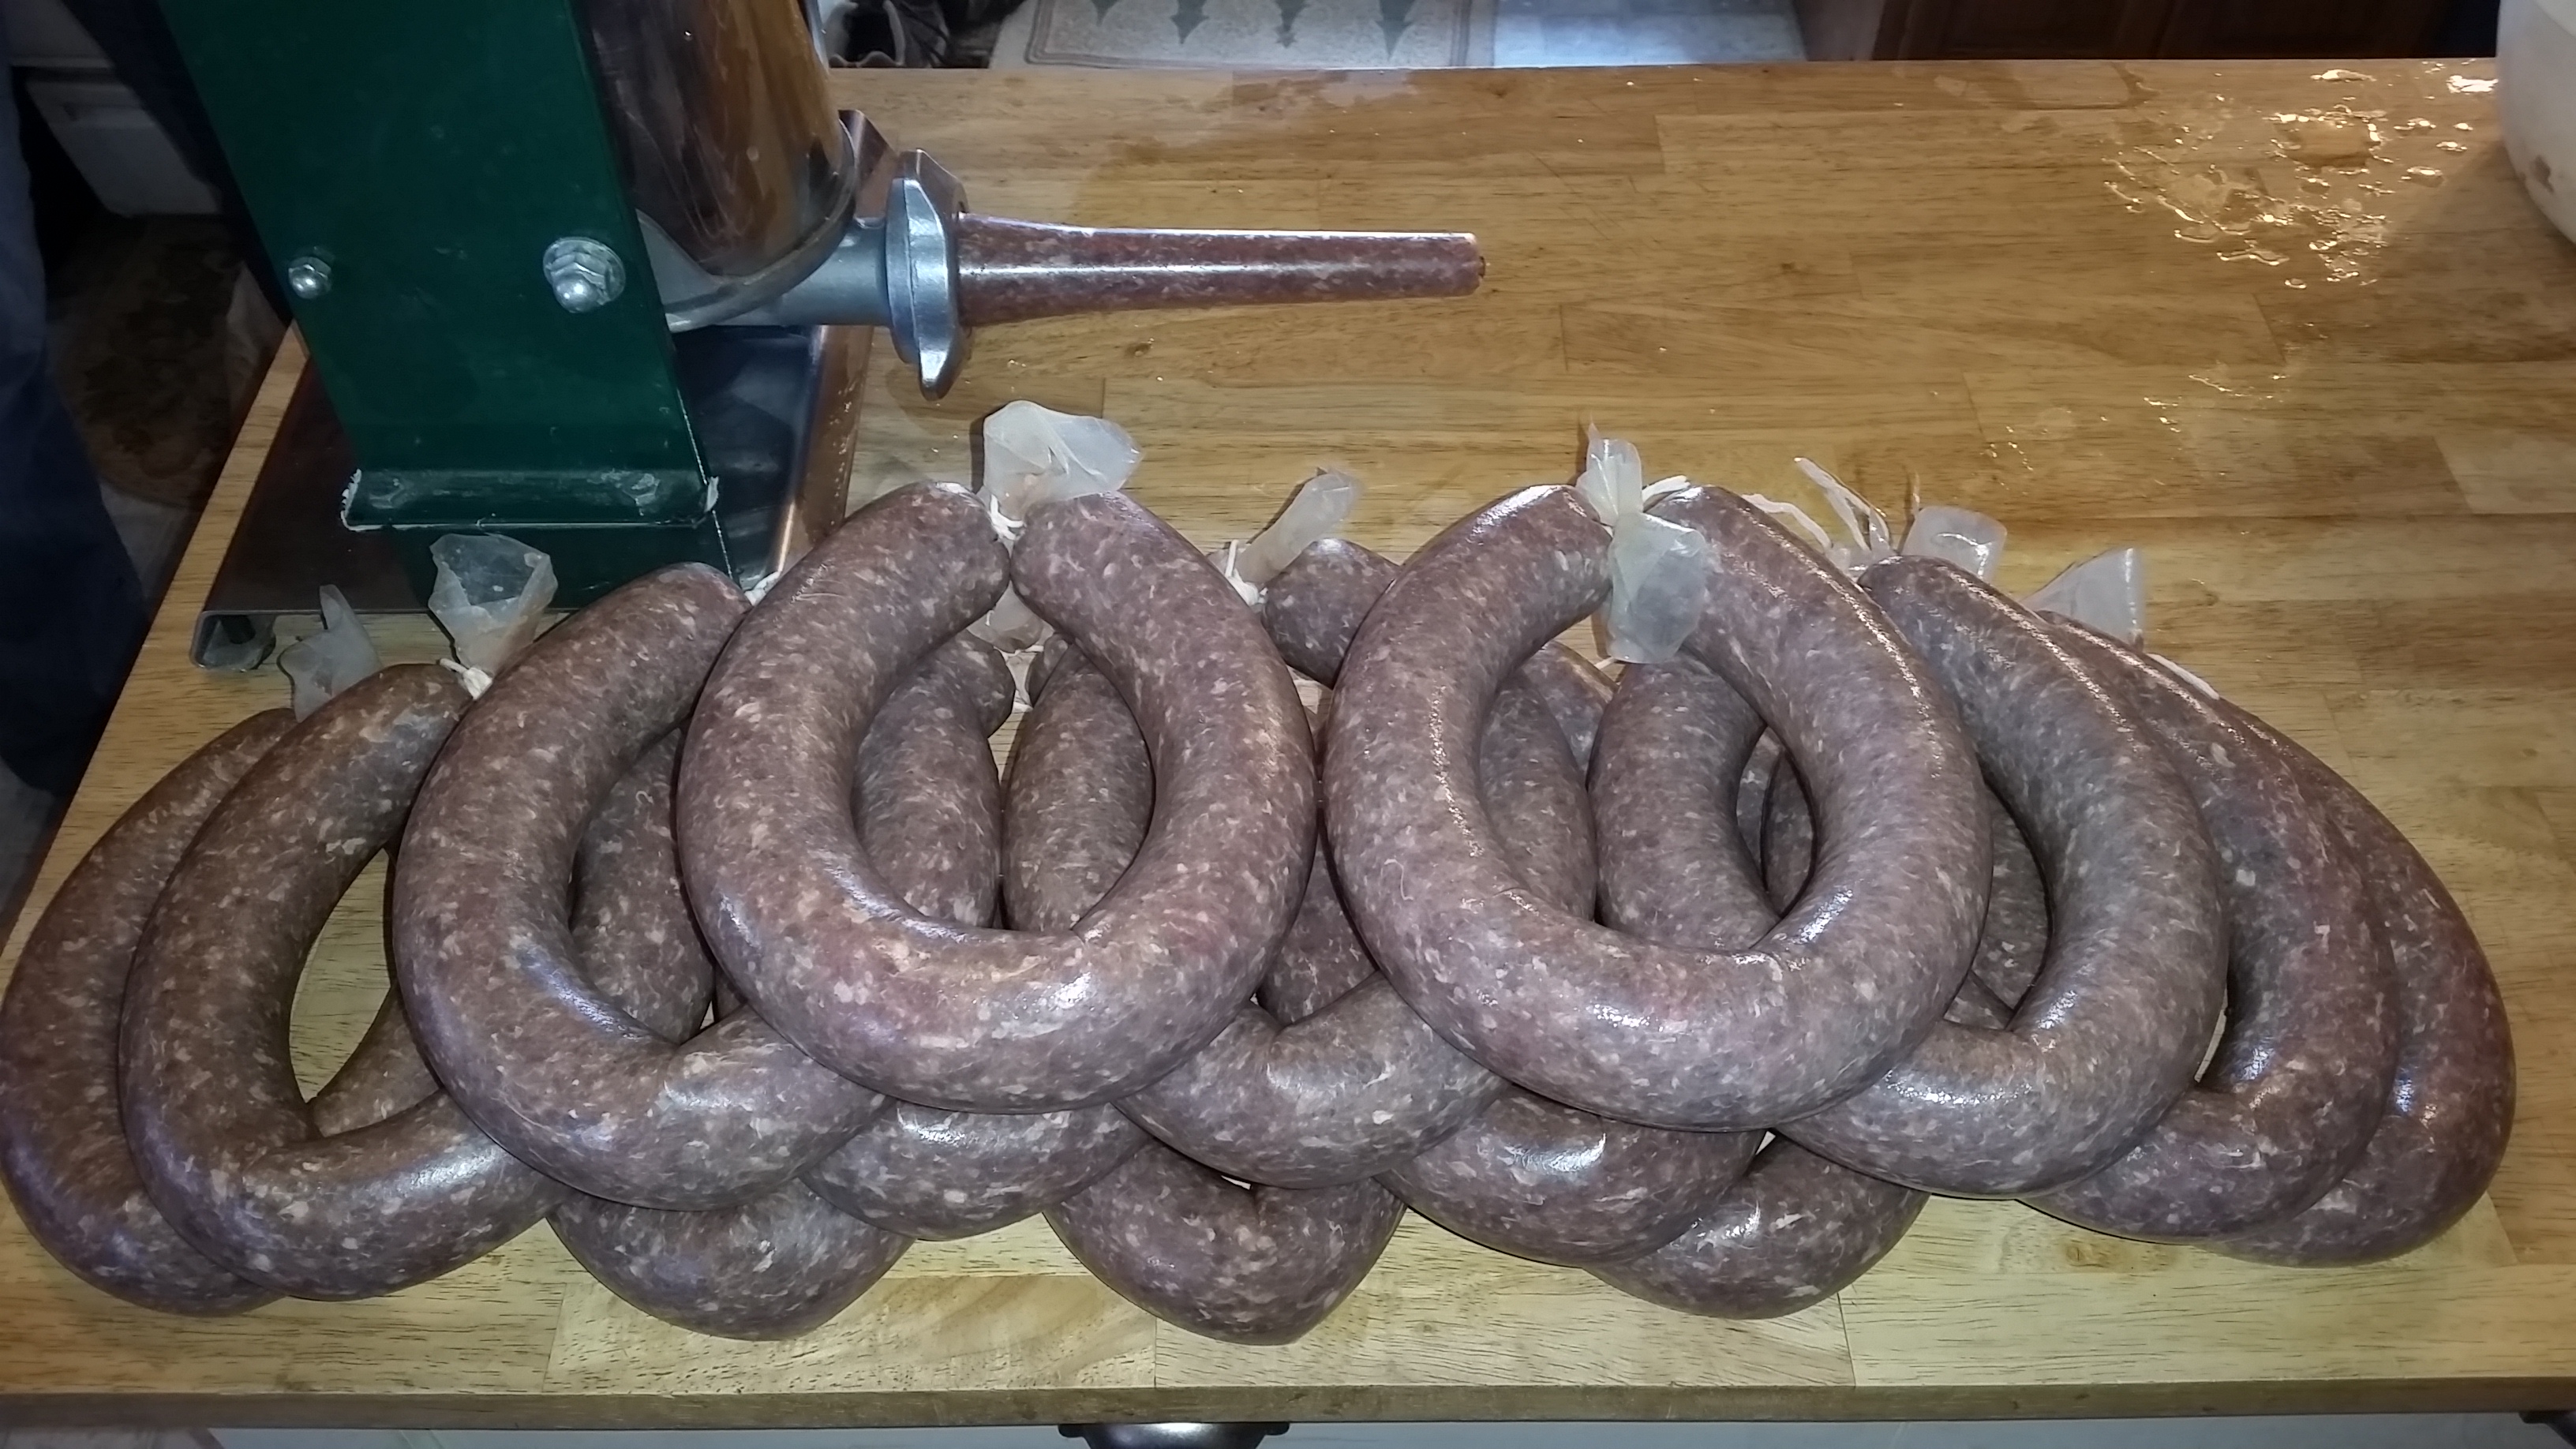 Now that the meat is seasoned, it is ready to be stuffed into casings. I fill the hopper on the stuffer and slide the casing onto the stuffing tube. Then I crank the handle while keeping pressure on the casing to make sure it fills evenly. Make sure you stop short of the end of the casing to allow room to tie the end off. Fill all of the casings and then put the stuffed sausages in the refrigerator for a minimum of four hours. Most of the time I let mine sit overnight and smoke them the next day. You can put stuffing tubes on most grinders if you don’t have a sausage stuffer, but it can be very tedious work. Once I started using a stuffer, I vowed to never stuff from the grinder again. One perk of my stuffer is it doesn’t empty out completely, leaving four to six ounces of meat in the hopper and tube when all is said and done. This gives me a great excuse to make a couple test patties.
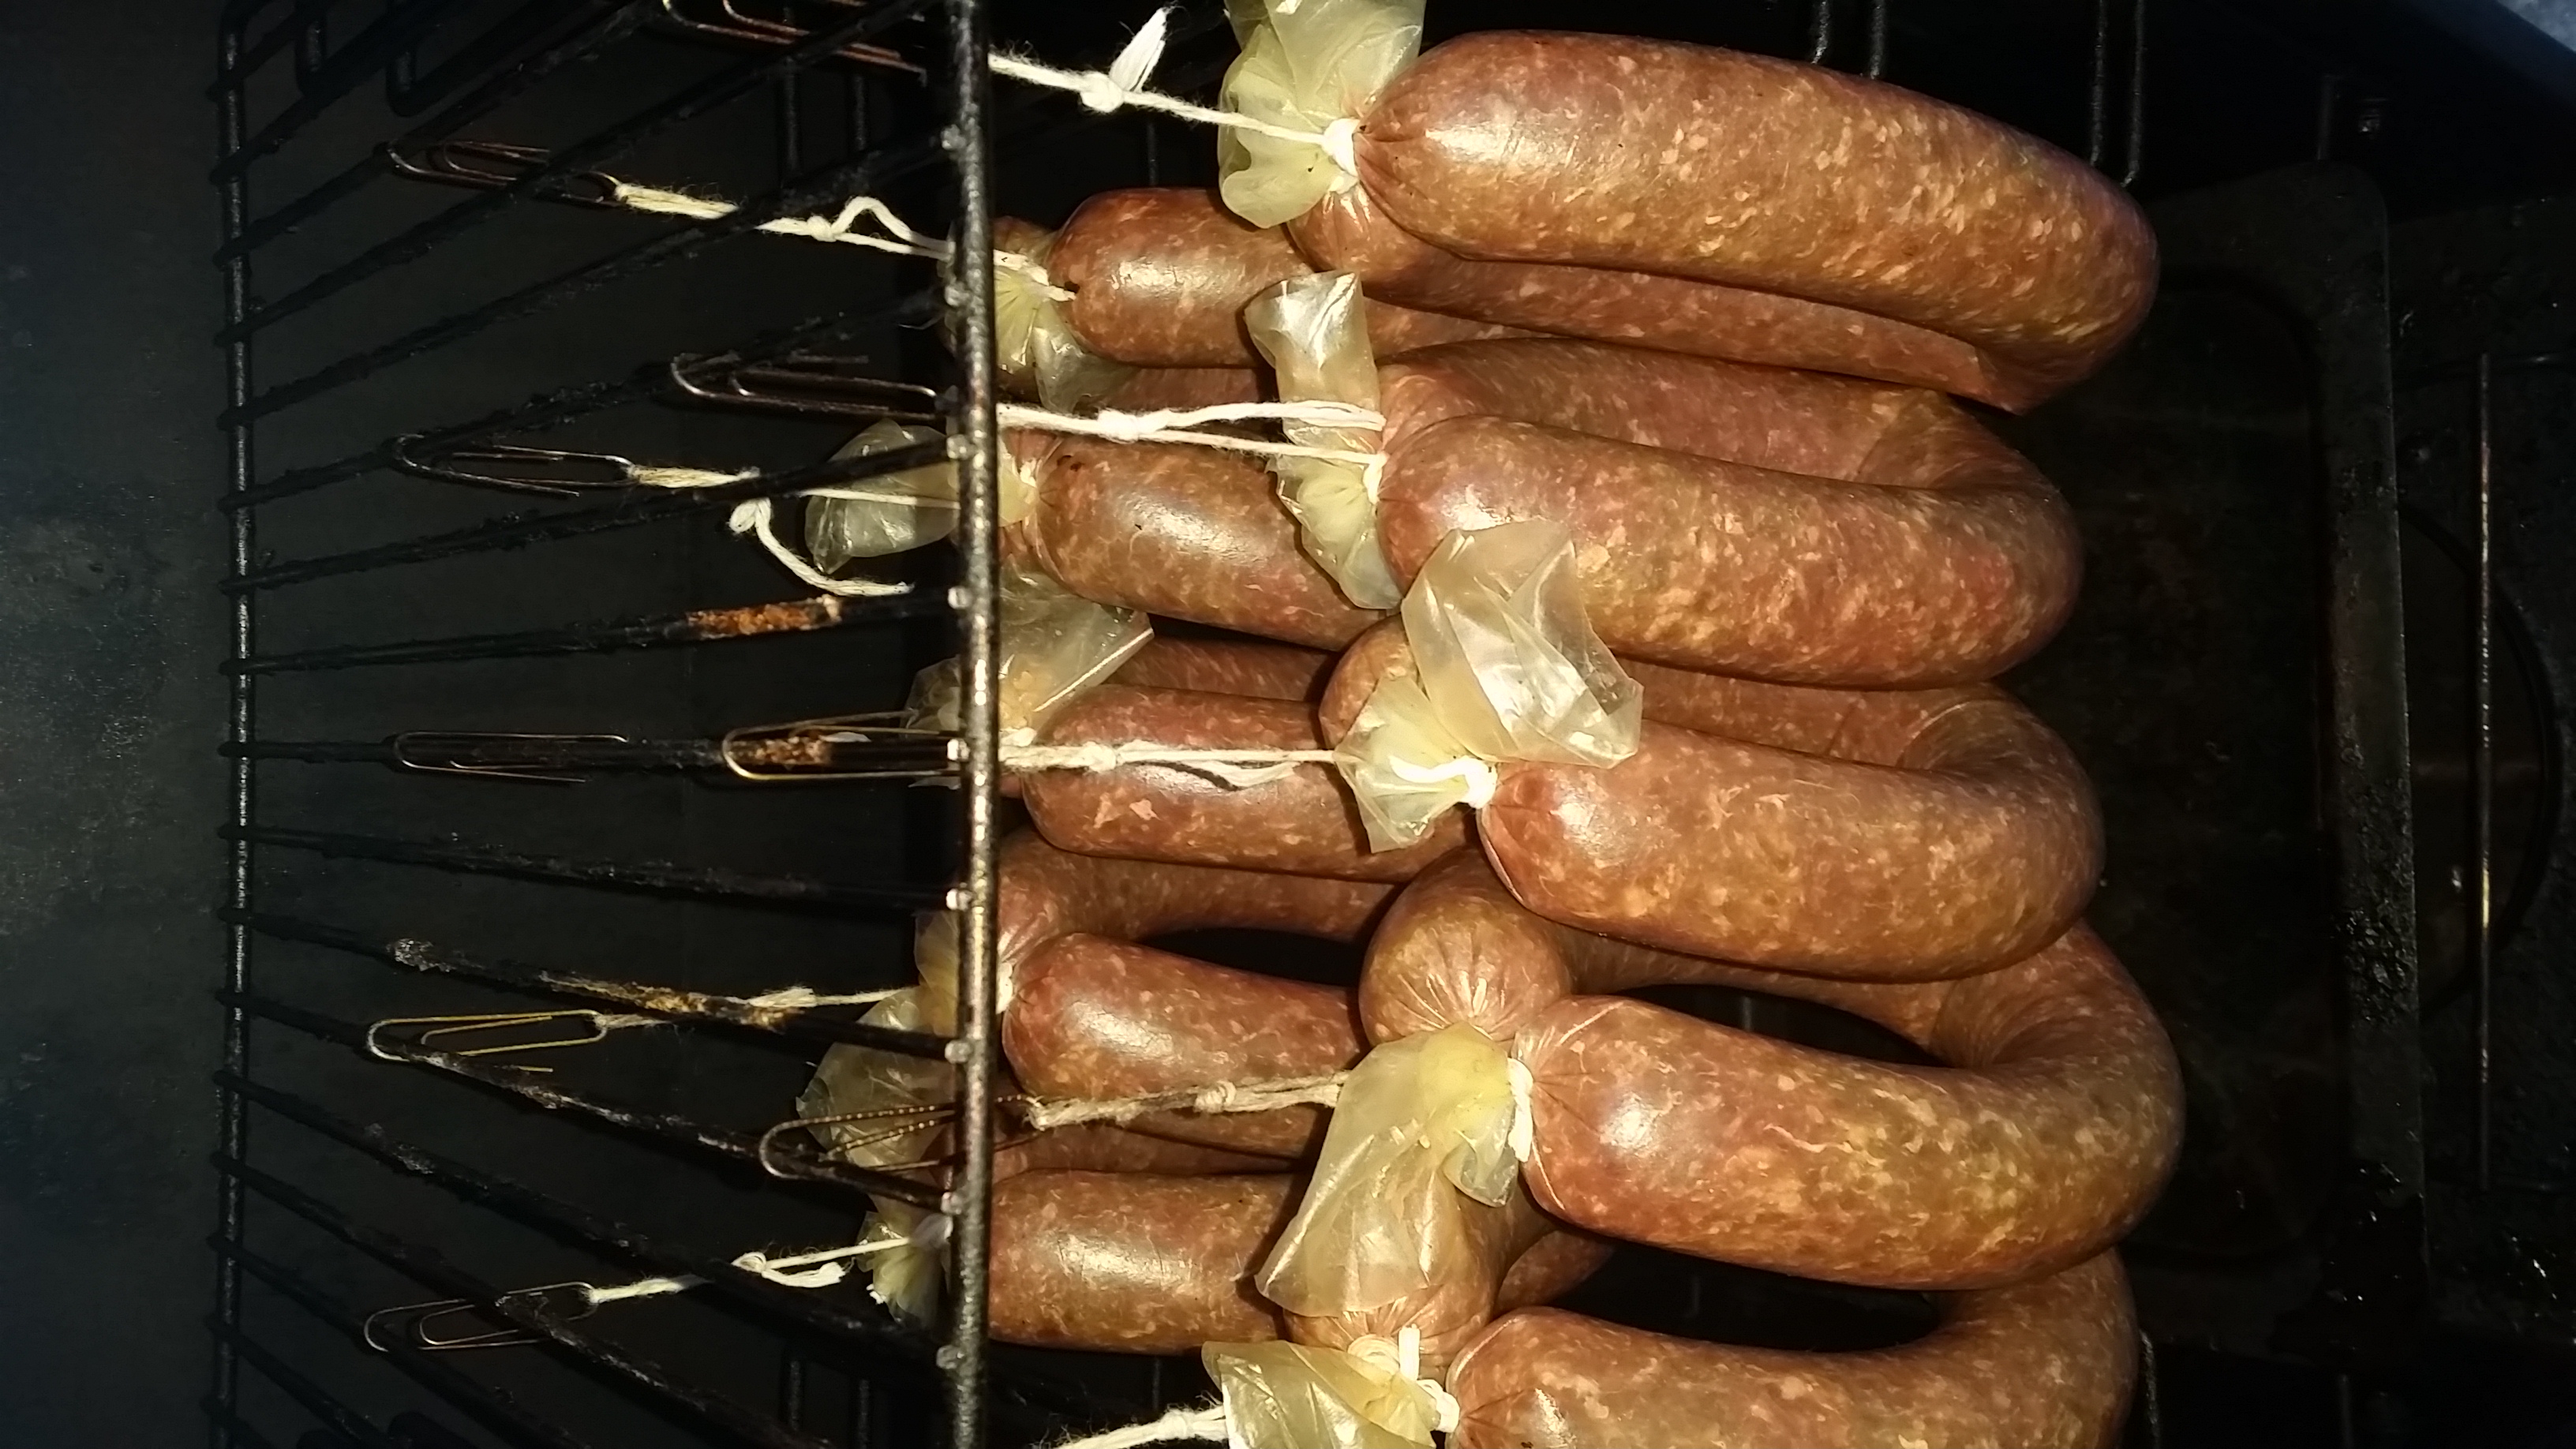 When the meat has firmed up in the refrigerator I prepare the smoker. I like to set the sausages out on the counter for an hour or so before they go into the smoker to give them a chance to warm up a bit. I hang almost all of the sausage I make, and I use paper clips to hold them to the rack in the smoker. When you put the sausage in the smoker, you want to make sure they aren’t touching. I usually rotate them at least once throughout the process to make sure smoke gets to all the surface of the sausage. I start out at a low temp (approximately 125 degrees) with water in the pan but no wood chips and the damper fully open. You want to give the casings a chance to dry out so the flavor can penetrate them.
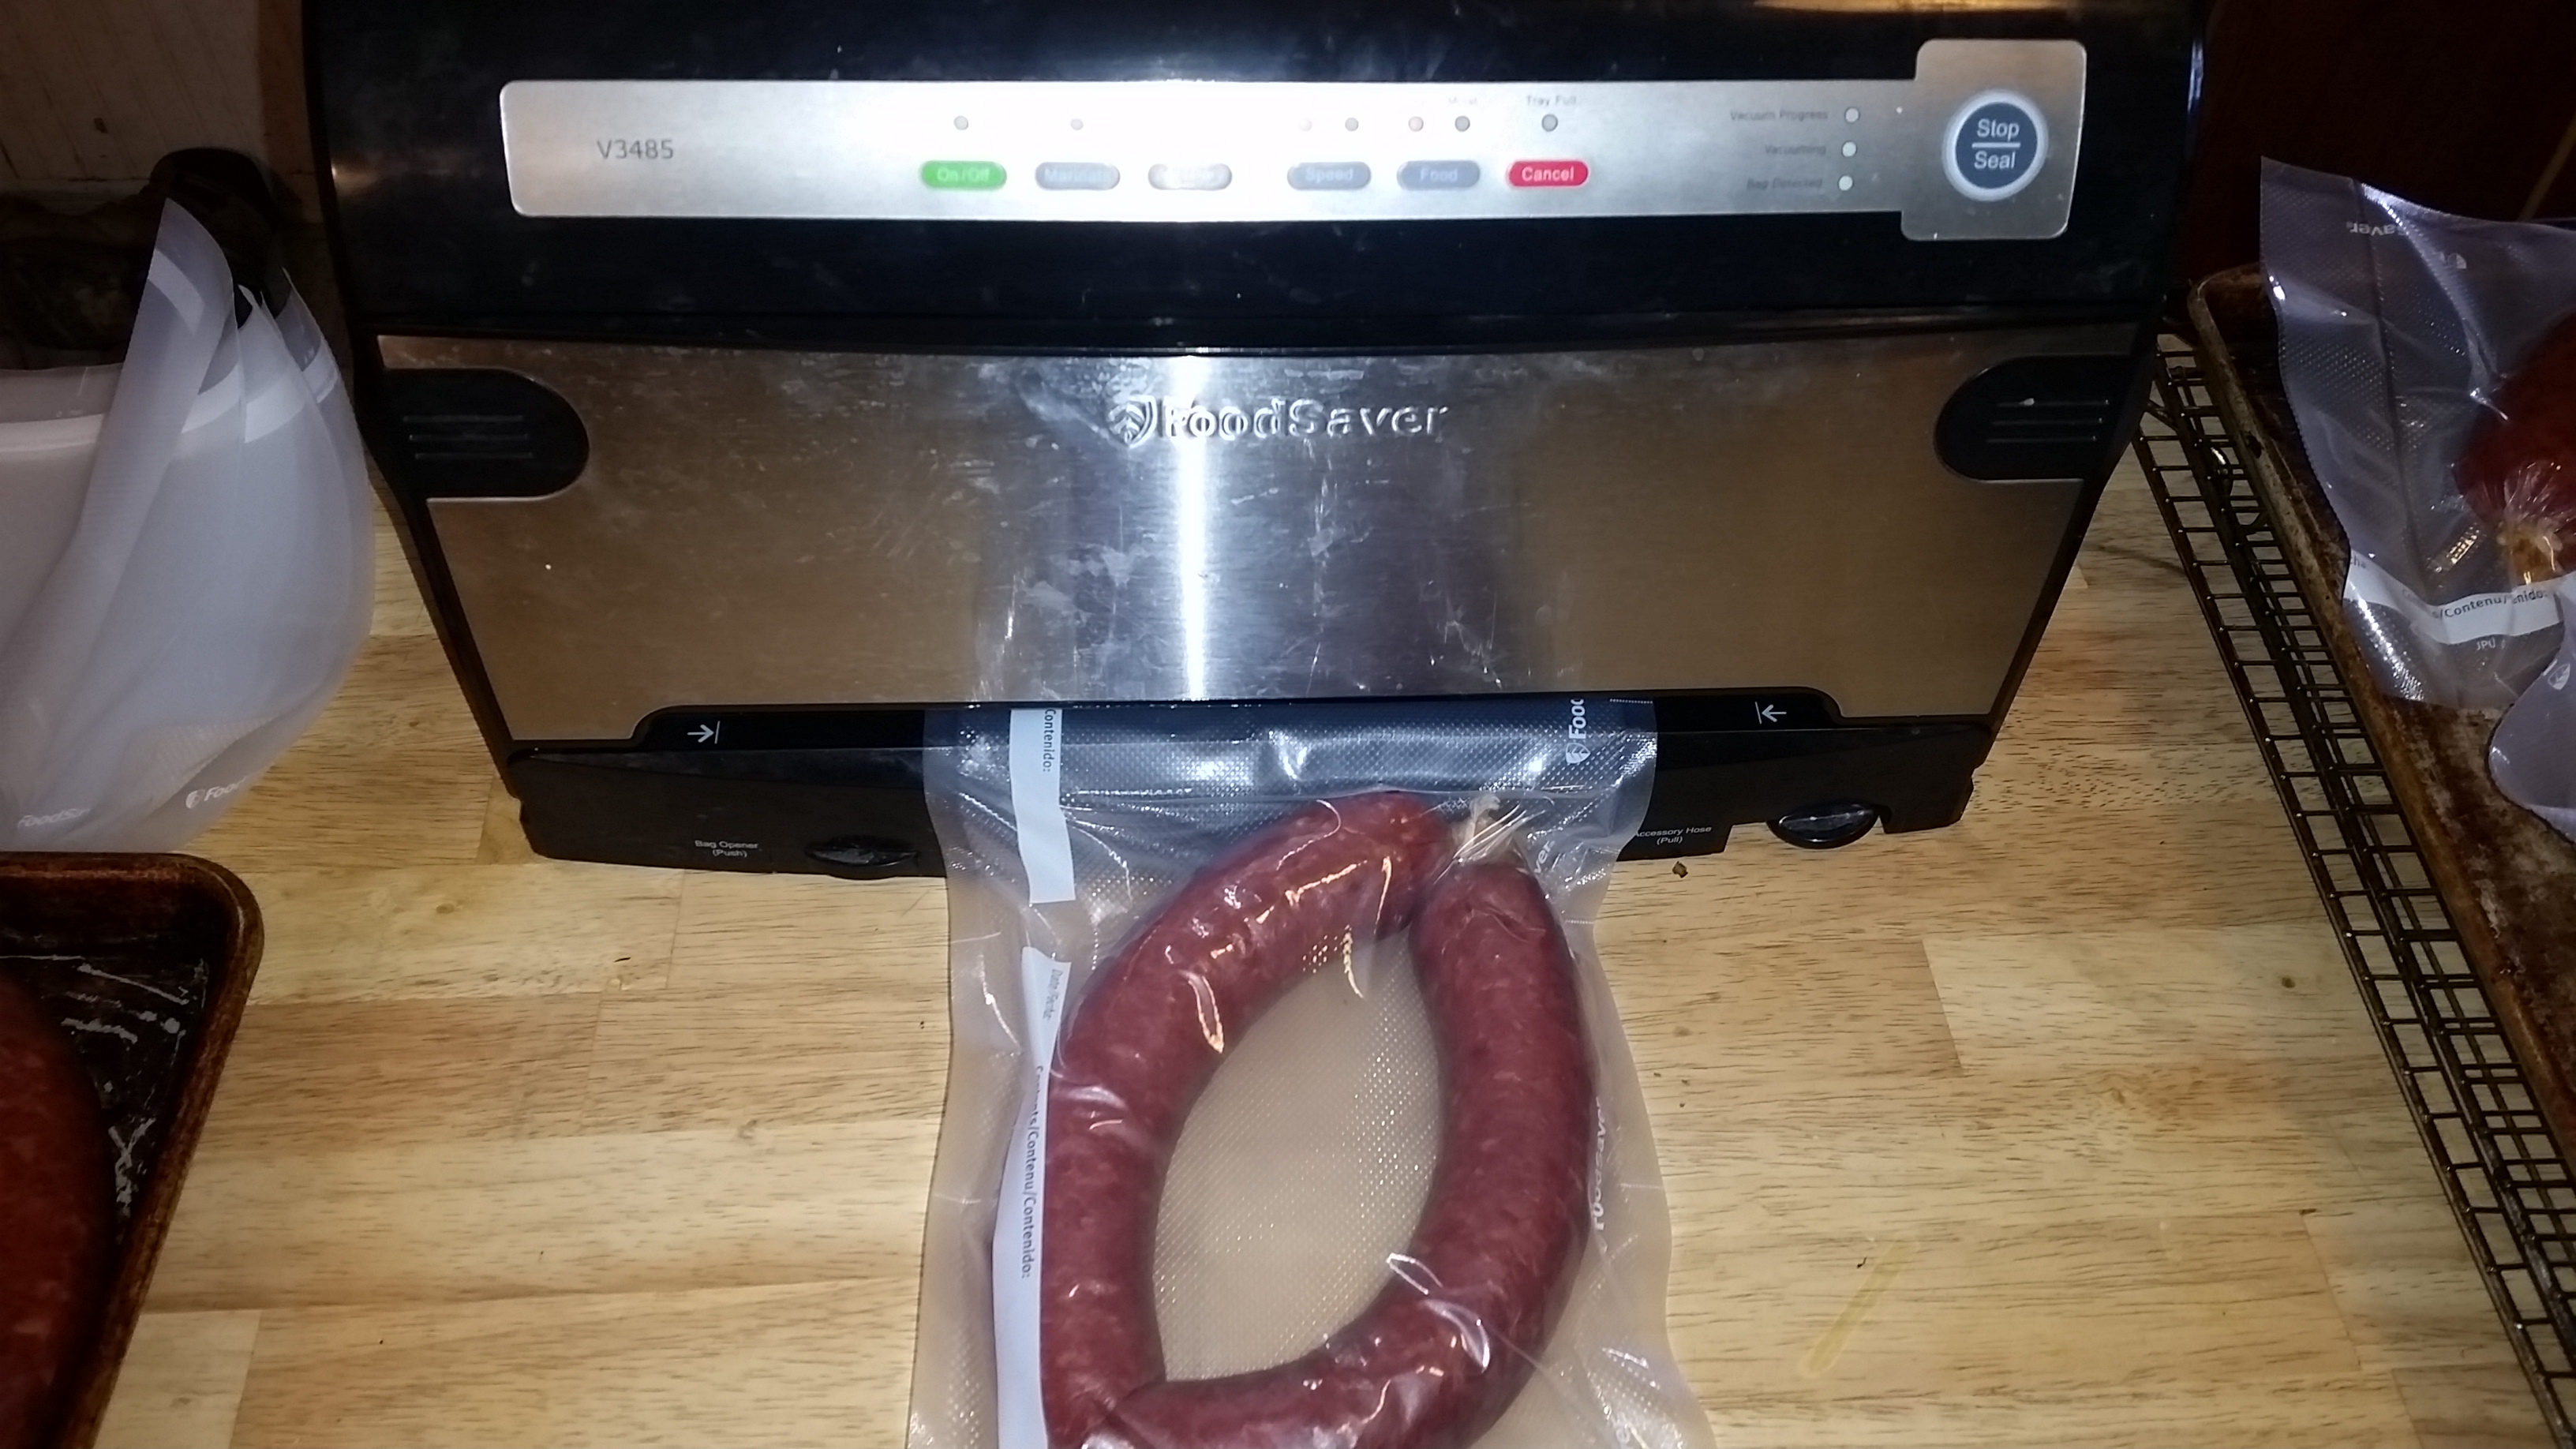
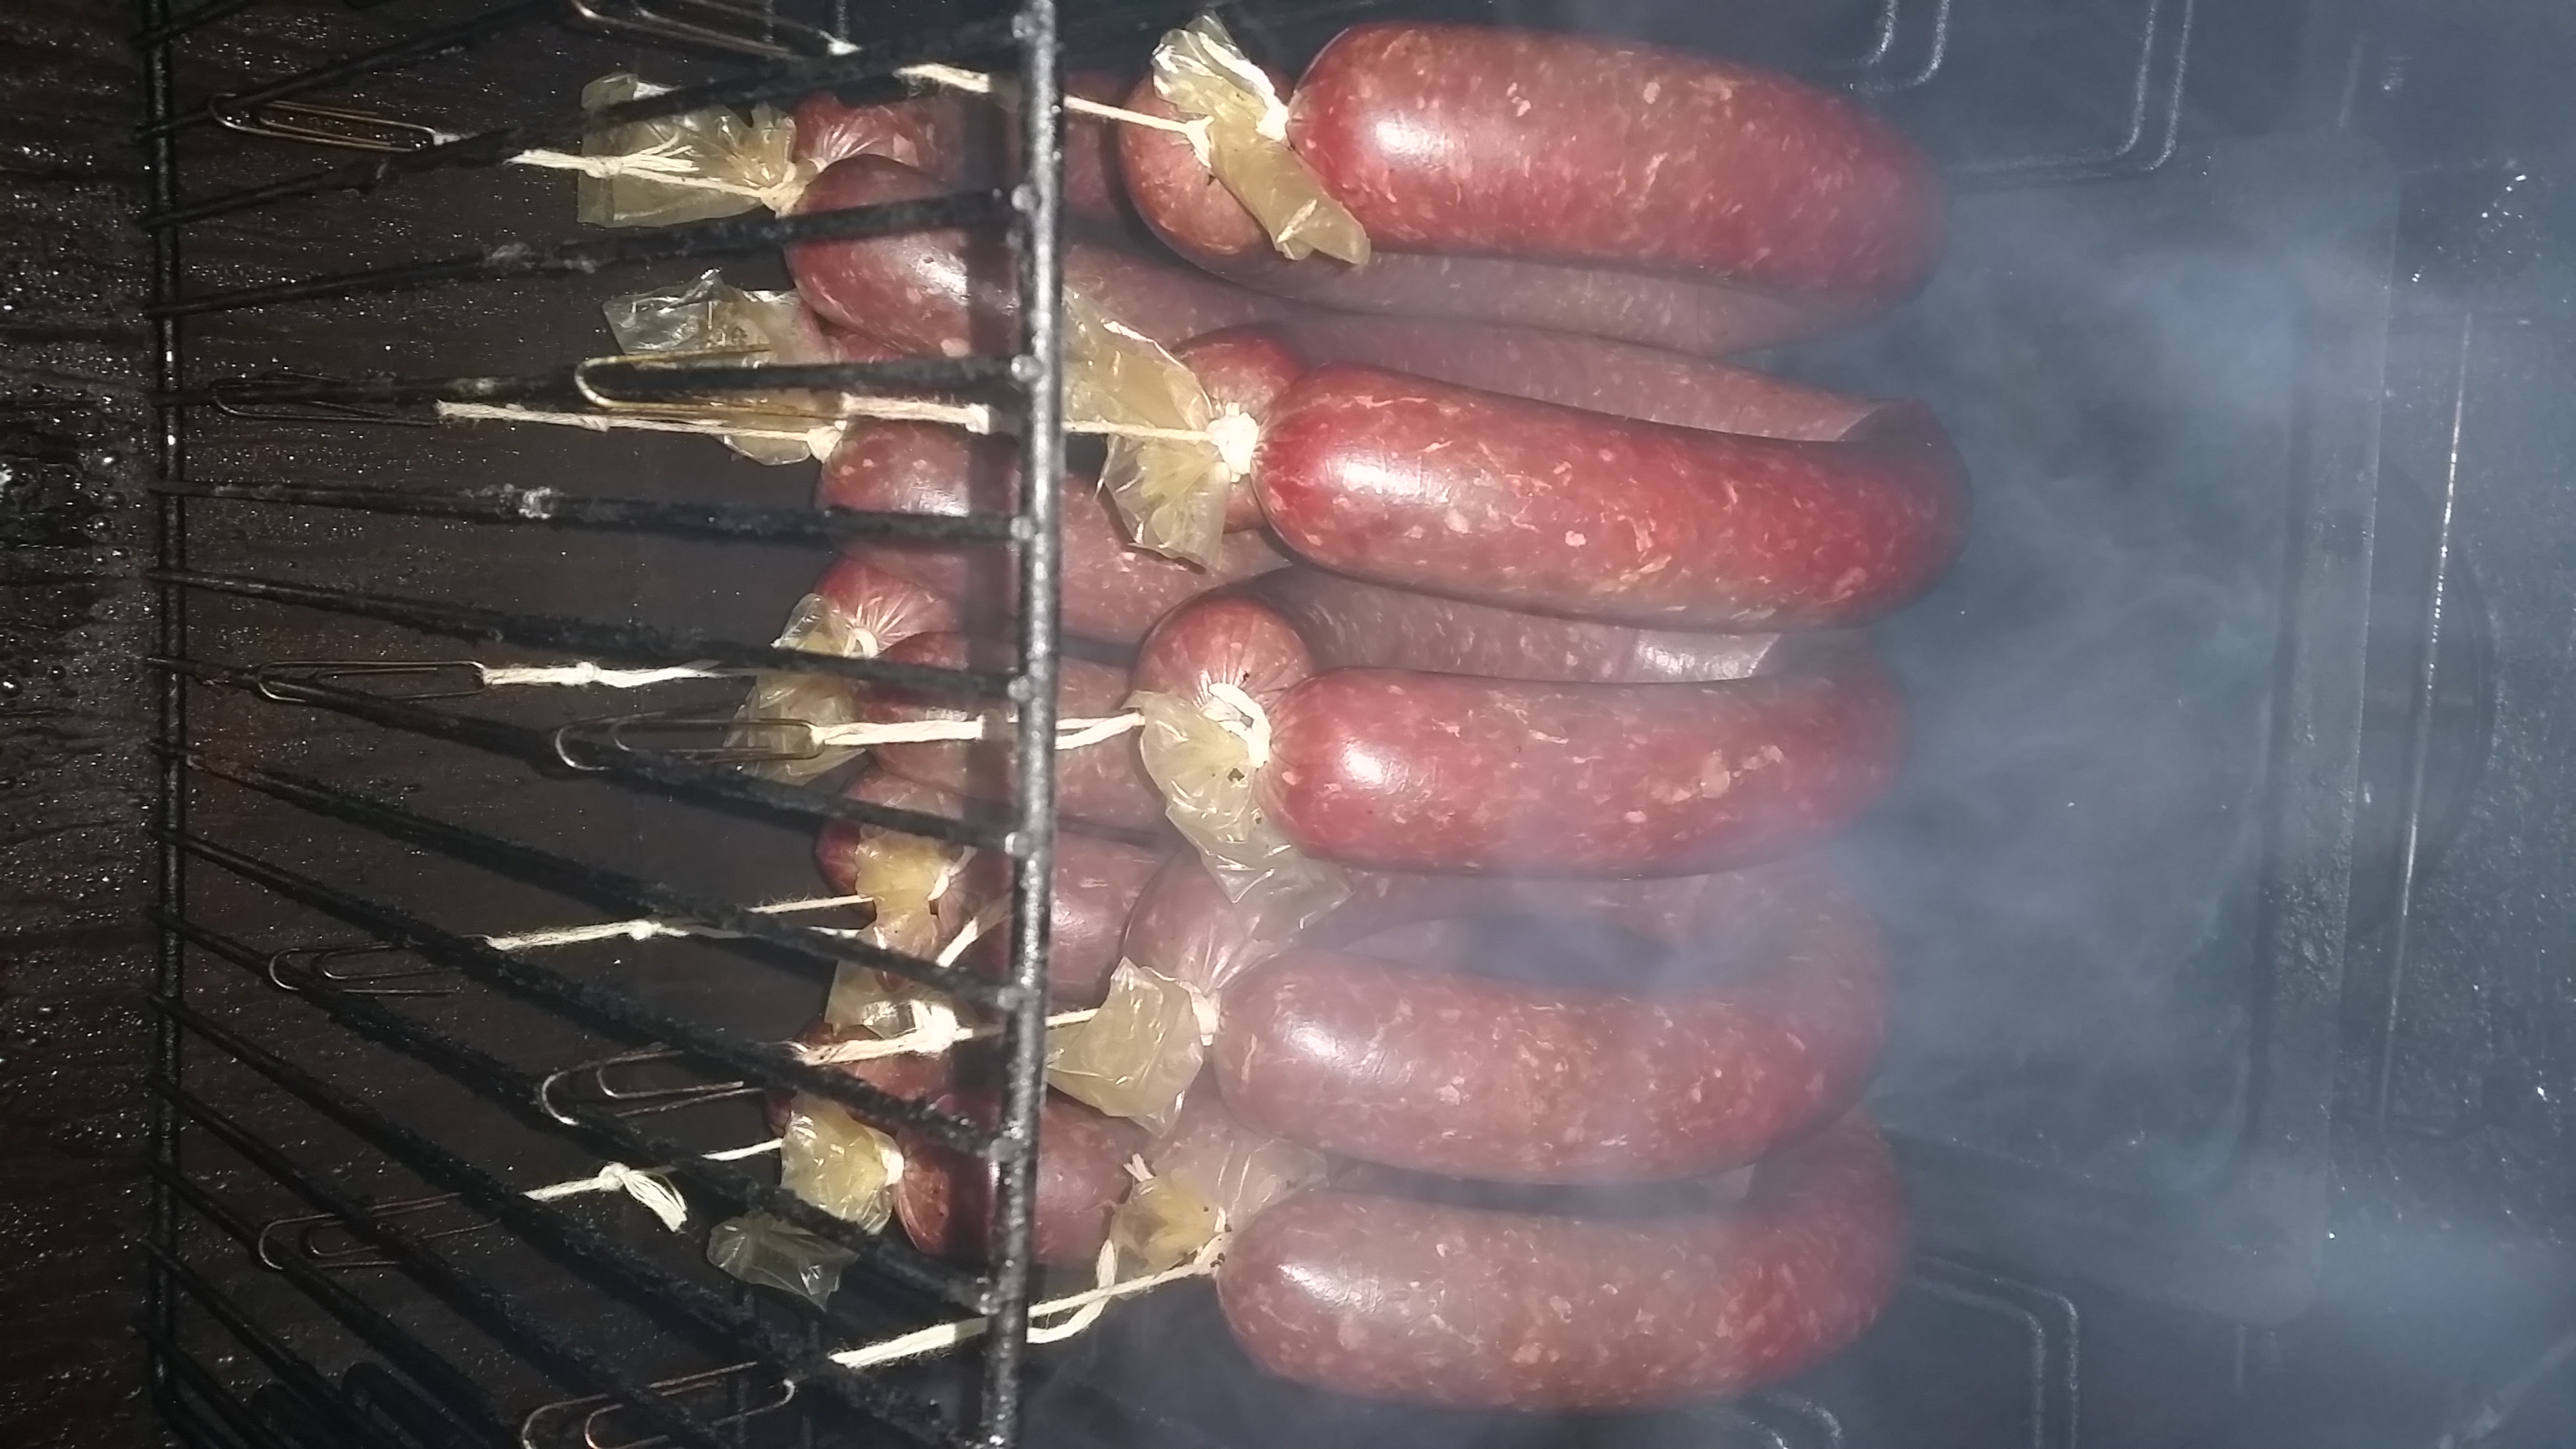 After an hour, I close the damper, add the wood chips, and bump the temp up to about 145 degrees. For this batch, I used a mixture of hickory and apple wood. I hold the temp at 145 for another hour and then bump it up to 180degrees. I keep the temp at 180 until the internal temp of the sausage reaches 155 degrees. This particular time it was very cold and windy, so I decided after two hours of smoke I would finish the job in the oven. I turned the oven to its lowest setting (approximately 200degrees) and cooked them for an hour until the temp was right. As I pulled them from the oven I put them in a cold water bath to cool them down. This helps prevent wrinkles in the casing and I think it helps the meat retain a little extra moisture. I put them in the refrigerator for a couple hours to cool them down then vacuum seal them and put them in the freezer.
 The majority of these steps stay the same regardless what type of sausage you are making. The casings, seasonings, and meat mixture ratio are the main variables in the process. It’s fun to experiment with different ratios and different kinds of seasonings to find the perfect recipe. There really isn’t anything difficult about this process, and it is very rewarding. There can be a lot of trial and error in both the seasoning and the smoking processes. The best thing to do is start with small batches and take your time. Make sure you weigh everything, and keep a journal so you can recreate a batch once you find one that you really like.